☰
×
Products
All Chemistry Products
RAD Shipping Containers
Radiochemistry
Nuclear Medicine
Technical Info
Applications Notes
Available Methods
Bibliography Search
User Worksops
Newsletter Archive
Resources
MSDS Documents
Certificates of Analysis
ISO 9001
About
Contact
User Notices
+1 (630) 963-0320
Contact
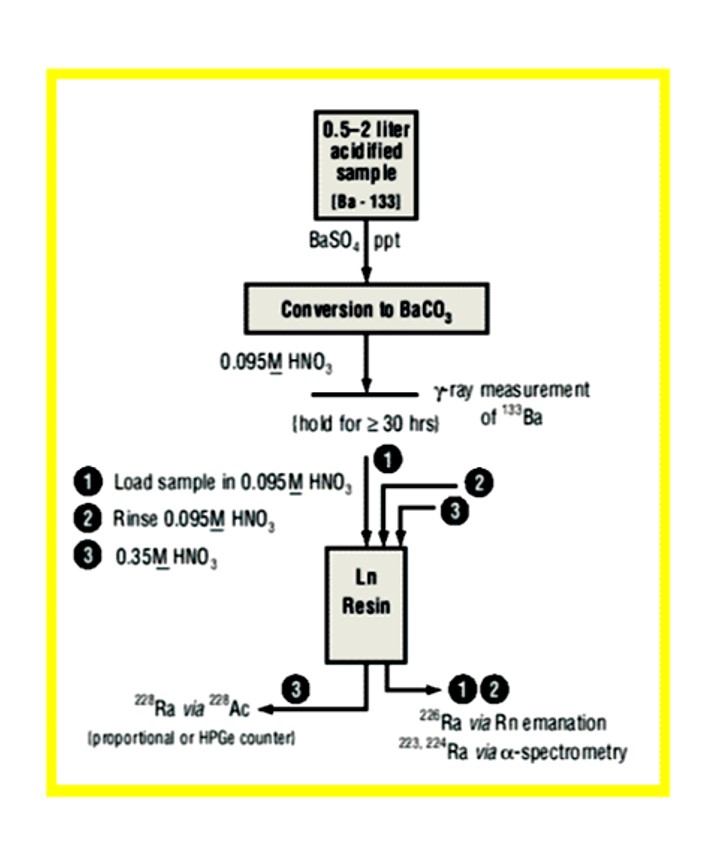
Figure 11_Radium Method Flow Chart_1
Page navigation
← Ln Resins
Interested in learning more about our products?
Send us a message via our contact form, and we'll answer any questions you may have.
Contact Us